How to Free Up Storage Space on a Windows PC Safely
Managing your digital footprint by freeing up storage space on a Windows PC safely helps your machine run faster and prevents frustrating performance bottlenecks. When your drive reaches capacity, the operating system struggles to manage virtual memory, often leading to sluggish response times and failed updates. By systematically clearing out unnecessary data, you can reclaim gigabytes of room while ensuring your personal files remain untouched and secure.
This process involves identifying bloated directories and utilizing built-in tools designed to maintain system health without compromising your data integrity. You will learn exactly which folders are safe to purge and how to automate maintenance for long-term efficiency.
Utilizing the Built-in Disk Cleanup Utility
The most reliable method for reclaiming lost capacity is the native Disk Cleanup tool. It has been a staple of the Windows environment for decades because it specifically targets files the system no longer requires to function.
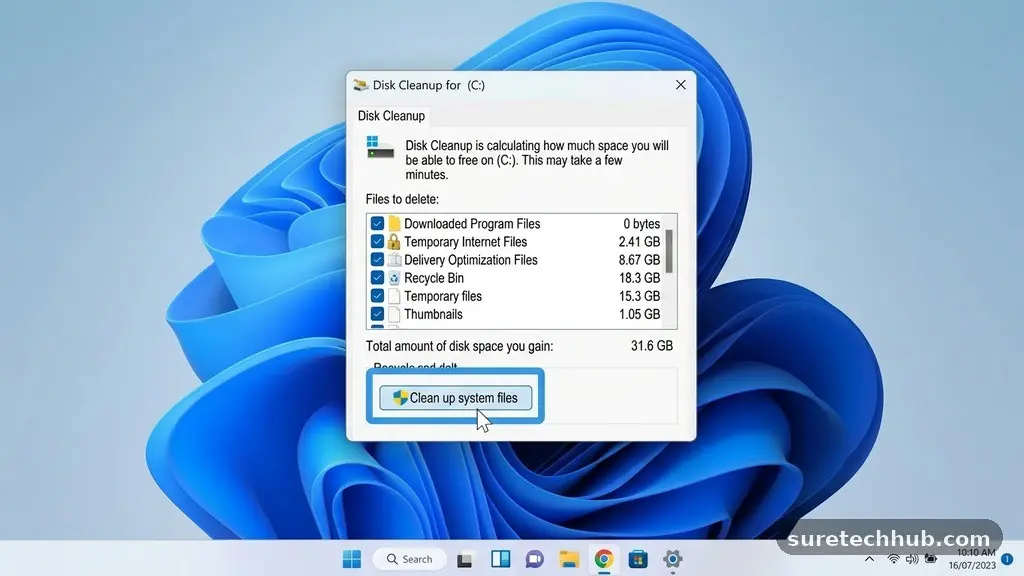
To access this, simply type “Disk Cleanup” into your taskbar search menu and select the drive you wish to analyze. The utility will calculate how much space you can recover by removing items like thumbnails, temporary internet files, and offline web pages.
Once the initial scan completes, you will see a list of checkboxes. You can safely select categories like “Temporary Files” and “Delivery Optimization Files” to reclaim significant amounts of room.
If you click the “Clean up system files” button, the utility will re-scan the drive with administrative privileges. This reveals even larger targets, such as previous Windows installation files that often consume several gigabytes after a major system update.
Be cautious when selecting “Downloads” if you use that folder for active projects. Many users mistakenly believe this folder is entirely junk, but it often contains installers or documents you might need later.
Always review the list before clicking “OK” to initiate the deletion process. This tool is highly effective because it prevents you from accidentally deleting core system files that are necessary for the OS to boot correctly.
Managing Temporary Files via System Settings
Modern versions of Windows offer a more visual and intuitive approach to storage management through the Settings app. Navigate to System and then Storage to see a breakdown of exactly what is consuming your disk space.
You will find a list categorized by Apps & features, Temporary files, and Other. Clicking on “Temporary files” provides a detailed view of what can be safely removed, including logs, cache, and diagnostic data.
This interface is particularly helpful because it shows you the exact size of each category before you commit to deleting anything. You can choose to remove files in your Recycle Bin or temporary files that haven’t been modified in a specific timeframe.
It provides a much more granular view than the legacy Disk Cleanup tool. If your computer is running low on room, this should be your first port of call for a quick assessment.
For users who want to keep their machine tidy, you can enable “Storage Sense” on this same screen. This feature automatically clears out temporary files and empties your Recycle Bin based on a schedule you define.
It is a set-and-forget solution that ensures you don’t have to manually intervene every time your drive starts to fill up. By allowing the system to handle the housekeeping, you keep your performance consistent.
Identifying Large Files and Unused Applications
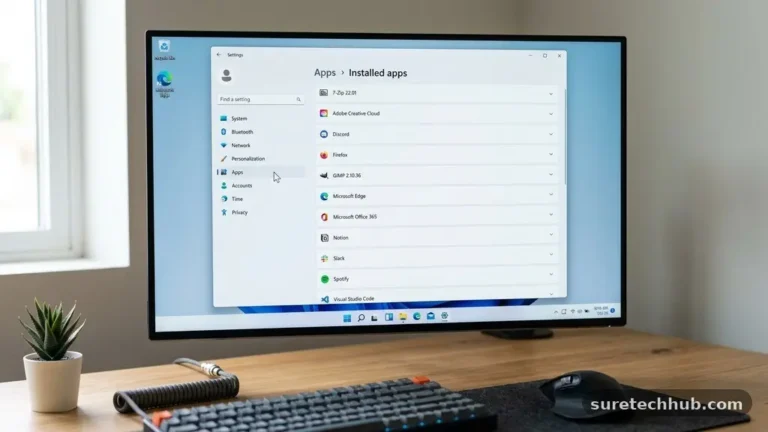
Sometimes, the culprit behind a full drive isn’t system bloat but rather a few massive files or programs you no longer use. Head back to the Apps & features section in your settings to sort your installed software by size.
You will often find games or creative suites that you haven’t opened in years taking up massive chunks of space. Uninstalling these can instantly free up 20GB or more depending on the program.
To find individual files, you can use the search bar in File Explorer with specific parameters. Typing “size:gigantic” into the search box will show you every file on your drive that is larger than 4GB.
This is a powerful way to locate forgotten high-definition videos, raw photo exports, or disk images that are hidden deep in your subdirectories. You might be surprised to find a massive backup file or an old installer you completely forgot about.
| File Category | Typical Size | Action |
|---|---|---|
| System Cache | 2GB – 8GB | Safe to delete |
| Old Installers | 500MB – 3GB | Safe to delete |
| Personal Videos | 1GB – 10GB+ | Move to external drive |
| Windows Update Logs | 100MB – 500MB | Safe to delete |
Moving Personal Files to External Storage
If your internal drive is consistently hitting its limit, the most sustainable solution is to offload your media-heavy content. Photos, videos, and music collections are usually the primary drivers of storage depletion.
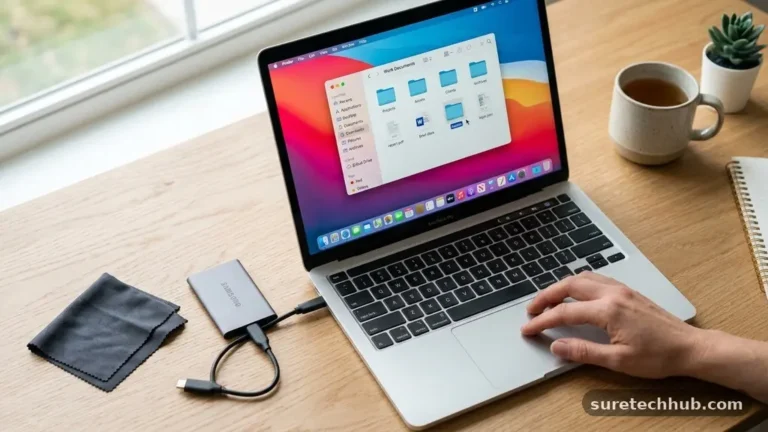
Investing in an external solid-state drive or a high-capacity hard drive provides a safe harbor for these files. You can move your entire “Pictures” or “Videos” folder to this external drive without losing access to your content.
Once you have moved your files, you can update the library paths in Windows to point to the new location. This keeps your user interface clean while ensuring your computer’s primary drive remains free for the operating system and essential applications.
For those who prefer cloud solutions, services like OneDrive allow you to keep files in the cloud while only downloading them to your PC when needed. This is known as “Files On-Demand” and is a game-changer for small-capacity laptops.
You can learn more about how to manage your data effectively by visiting the official Microsoft support resources for disk management. Following their guidelines ensures that you are using recommended practices. Moving files is often safer than deleting them, as it prevents the accidental loss of irreplaceable memories or important work documents.
Handling Windows Update Residuals
Every time you perform a major system update, Windows keeps a copy of the previous installation. This folder, usually named “Windows.old,” can be massive, often exceeding 15GB.
While it is useful if you need to roll back to a previous version, it is largely unnecessary once you are satisfied with the new update. You can safely remove this via the Disk Cleanup tool under the “Previous Windows installation(s)” category.
If you are currently running a version of Windows that you find stable and reliable, there is no reason to keep these backup files. Deleting them is a perfectly safe way to reclaim a massive amount of storage in one go.
However, be aware that once you delete these files, you will not be able to revert to your previous operating system version. Make sure your computer is running smoothly before you decide to execute this specific cleaning task.
It is also worth noting that Windows update files can sometimes get stuck in a “pending” state. If you notice your storage is disappearing and you can’t find the source, check the SoftwareDistribution folder.
While manually clearing this can be technical, it is a known fix for when the OS is misreporting its storage usage. Just be sure to stop the Windows Update service before attempting to modify any files in that directory.
Optimizing Disk Space with Compression
Windows features a built-in compression utility called NTFS compression that can shrink the size of your files on the drive. You can enable this by right-clicking a drive in File Explorer, selecting Properties, and checking “Compress this drive to save disk space.”
This is particularly effective for folders containing documents or text-based files that do not compress well on their own. It operates in the background and is transparent to the user.
While this does require a small amount of extra CPU power to decompress files on the fly, modern processors handle this task effortlessly. You will likely not notice any performance impact on your daily workflow.
It is an excellent way to squeeze a bit more life out of a nearly full drive without actually deleting a single file. This is a “set and forget” method that works continuously.
* Compress your documents folder.
* Avoid compressing folders with high-resolution video.
* Check the “Compress contents” box in advanced folder properties.
* Monitor your CPU usage if you have a very old processor.
* Disable it if you notice any lag in file opening times.
Frequently Asked Questions
Is it safe to delete everything in the Temp folder?
Yes, it is generally safe to delete the contents of the temporary folders in Windows. These files are created by programs to hold data while they are running or updating, and they are usually abandoned once the process is complete. If a file is currently in use, Windows will simply prevent you from deleting it, so there is no risk of breaking the system.
Why does my storage fill up even after I delete files?
If you notice that space is disappearing, check your Recycle Bin. Many users forget that deleting a file only moves it to a holding area instead of removing it from the drive entirely. Additionally, Windows might be automatically creating restore points or system shadows that consume space in the background.
What is the easiest way to find what is taking up space?
The built-in Storage Settings menu is the most accessible way to visualize your disk usage. For more advanced users, third-party visualization tools can create a “map” of your drive, showing you exactly which folders are the largest. These tools make it immediately obvious if a single game or video file is the root cause of your storage issues.
Should I delete Windows.old?
You should only delete the Windows.old folder if you have verified that your current version of Windows is stable. Once this folder is removed, you lose the ability to easily revert to your previous version of the operating system. It is a great way to free up space, but only do it after you have confirmed everything is working perfectly.
Can I safely delete my downloads folder?
You should review the contents of your downloads folder before deleting it entirely. While it contains a lot of temporary installers and documents, you might have saved important files there that you haven’t moved to a permanent location yet. Sort the folder by date or size to identify what is truly junk and what needs to be archived.
Maintaining Long-term Storage Health
Keeping your system lean is an ongoing task rather than a one-time event. By adopting the habit of periodically reviewing your large files and clearing out temporary data, you prevent the accumulation of digital clutter. Using the tools provided within the operating system is the safest way to ensure that your PC remains responsive and functional for years to come.
Prioritize moving your media library to external storage to keep your primary drive agile. This simple step often makes the biggest difference in day-to-day performance.
Remember that freeing up storage space on a Windows PC safely is about making informed choices rather than aggressive mass deletions. With these strategies in place, you can enjoy a faster, more reliable computing experience without the anxiety of running out of room.